How-To Write eMMC
Description
The Raspberry Pi Compute Module 4 comes with or without onboard eMMC memory. It's main purpose is to replace the SD card as the main start or boot medium. The memory size ranges from 8 GB to 32 GB.

Requirements
- Micro-USB to USB-A cable or adapter
- 24 volts power supply with 2 pin power plug for the Pi-Tron CM4
- Development computer or another Raspberry Pi
- The rpiboot program from https://github.com/raspberrypi/usbboot
- For Windows: A Windows installer can be found here: rpiboot_setup.exe
- Raspberry Pi users will have to build the program, please follow the instructions on the rpiboot Github page.
- The Raspberry Pi Imager program, to write an image to the eMMC memory of
the CM4.
- Visit https://www.raspberrypi.com/software/ to get the program, if not installed.
- Of course any other SD card writing program can be used, if you feel more comfortable in doing so. This How-To is based on the Raspberry Pi Imager, please adapt the shown steps to fit your image writing program.
- Optional
- Keyboard, mouse and HDMI monitor for a non-headless boot, in case the username and password for the Pi-Tron CM4 are not pre-set when using the Raspberry Pi Imager. See the how-to below for more information.
How-To
For Windows development computers:
Download and run the rpiboot Windows installer to install the drivers and boot tool for the Compute Module 4 with eMMC.
Danger of data loss
It is strongly recommended to disconnect any other USB removable storage if possible, before continuing with this How-To. If an SD card image is written by accident to any attached USB storage device other then the CM4 eMMC memory, the data on the device will be lost.
- Connect the Micro-USB cable to the Pi-Tron CM4 and plug in the other into the development computer. Don't power on the Pi-Tron yet.
- Start the rpiboot program
-
Now power on the Pi-Tron CM4
-
Verify that the green led next to the OTG port is on as well as the blue led next to the CM4, signaling an active OTG (USB) connection.

-
-
Wait until rpiboot finds the Pi-Tron CM4 and mounts it as a new removable drive in Windows.

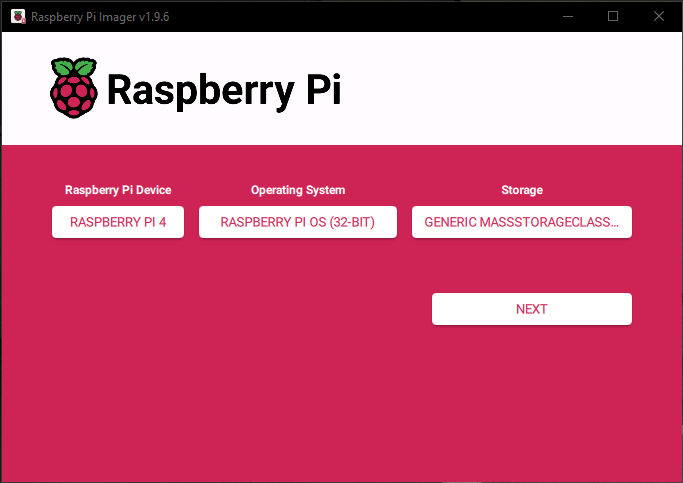
- Start the Raspberry Pi Imager.

- Choose a Raspberry Pi device
- Choose an image or select your own
- Choose the eMMC as storage device
- Click on Next to customize the image
- Click Edit Settings to make the following changes
- pre-set a username and passwort
- enable the SSH server, needed for remote network login
- pre-configure Wi-Fi settings, if only Wi-Fi access is available
- change the default hostname
- and more...
- It is recommend pre-setting a username and password as well as enabling the SSH server. This way the Pi-Tron CM4 can be booted headless.
- Click Save and then Yes.
- Click Yes again to confirm to write the image to the eMMC.
- Once the write process has finished, the removable media is ejected automatically.
- Power off the Pi-Tron CM4.
- Unplug the Micro-USB cable from the Pi-Tron CM4.
This concludes the How-To.
You can now power on the Pi-Tron CM4 again and it should boot the OS from the image you have just written to it's eMMC memory.
Restrictions
- No known restrictions
Related documentation
- Official Raspberry Pi guide to Flashing the Compute Module 4 eMMC
- Covering all aspects of the Raspberry Pi, the official documentation: https://www.raspberrypi.com/documentation
- Raspberry Pi Compute Module 4 product page: https://www.raspberrypi.com/products/compute-module-4
- rpiboot Github: https://github.com/raspberrypi/usbboot
- Raspberry Pi software: https://www.raspberrypi.com/software
- Raspberry Pi OS now requires users to create their own login credentials on first boot: https://www.raspberrypi.com/news/raspberry-pi-bullseye-update-april-2022