Using the Internal Flash Storage
As described in the chapter Booting an Image you can generate a SD card for your device and use it during development. When you are interested in using the internal flash (SPI-NOR, eMMC, NAND) then continue reading. In the following it is described how to setup your device with a A/B partition scheme so that you will be able to update your system seamlessly in the future.
Partition Layout
Kontron i.MX8MM
| Component | Storage | Linux Devicenode | Size | Filesystem |
|---|---|---|---|---|
| Linux Root-Filesystem A/B Layout, Boot Volume and Data Volume | eMMC, NAND | /dev/mmcblk0pX |
32GB | ext4 |
| U-Boot | NOR | /dev/mtd0 |
1920 KiB | raw |
| U-Boot env (copy 1) | NOR | /dev/mtd1 |
64 KiB | raw |
| U-Boot env (copy 2) | NOR | /dev/mtd2 |
64 KiB | raw |
Kontron i.MX6UL
| Component | Storage | Linux Devicenode | Size | Filesystem |
|---|---|---|---|---|
| Linux Root-Filesystem A/B Layout, Boot Volume and Data Volume | eMMC, NAND | /dev/mtd0 |
512MB | ubifs |
| U-Boot SPL | NOR | /dev/mtd1 |
896 KiB | raw |
| U-Boot env (copy 1) | NOR | /dev/mtd2 |
64 KiB | raw |
| U-Boot env (copy 2) | NOR | /dev/mtd3 |
64 KiB | raw |
Factory Setup / Initial Partitioning
if you have a Kontron Demoboard with Software release version greater than v5.0.0 initial partitioning is already completed in factory. You don't have to repeat the step. Just skip to the chapter Perform seamless system Update
Install Images
using ptool
For factory setup you need the images listed below. The images are created during the Yocto build
when executing bitbake image-ktn or bitbake bitbake image-ktn-qt. The images are then deployed
to the directory ~/yocto-ktn/build-ktn-imx/tmp/deploy/$MACHINE/images.
| Description | Image Name (mx6ul) | Image Name (mx8mm) |
|---|---|---|
| U-Boot | flash.bin |
flash.bin |
| U-Boot environment | u-boot-initial-env-kontron-mx6ul |
u-boot-initial-env-kontron-mx8mm |
| bootfs | image-ktn-bootfs-kontron-mx6ul-ktn-dunfell.tar.gz |
image-ktn-bootfs-kontron-mx8mm-ktn-dunfell.tar.gz |
| rootfs | image-ktn-kontron-mx6ul.tar.gz |
image-ktn-kontron-mx8mm.tar.gz |
| userfs | image-ktn-userfs-kontron-mx6ul-ktn-dunfell.tar.gz |
image-ktn-userfs-kontron-mx8mm-ktn-dunfell.tar.gz |
-
Copy the images into the directory
/home/root/fw/on your device. -
Flash bootloader binaries and environment
ptool flash_bl_spl && ptool flash_bootvars
using Swupdate (only Kontron i.MX8MM)
Initial setup is also implemented for i.MX8MM devices. You only need the swu archive (bitbake swupdate-img-qt) and you should be able to install it locally or via integrated webserver.
eMMC / NAND Partition sizes
To change the default partition sizes, see /usr/share/production/prod-env.sh and change the default values. Consider that the eMMC has a maximum of 32GB.
# partition sizes on eMMC (MB)
rootfs_size=10000
bootfs_size=50
# userfs (if size empty -> all remaining space taken else SIZE in MiB)
userfs_size=""
-
Flash the eMMC on i.MX8MM or the NAND flash on i.MX6UL devices
3.1 Kontron i.MX8MM:
ptool flash_emmc_AB3.2 Kontron i.MX6UL:
ptool flash_ubi_AB
This command will take some time and the status will be prompted.
Afterwards you can check the eMMC device with lsblk
root@kontron-mx8mm:~# lsblk | grep mmcblk0
mmcblk0      179:0    0 29.1G  0 disk
├─mmcblk0p1  179:1    0   50M  0 part /mnt
├─mmcblk0p2  179:2    0  9.8G  0 part
├─mmcblk0p3  179:3    0  9.8G  0 part
└─mmcblk0p4  179:4    0  9.6G  0 part /usr/local
mmcblk0boot0 179:32   0    4M  1 disk
mmcblk0boot1 179:64   0    4M  1 disk
The NAND flash with ubinfo -a
Volume ID:   0 (on ubi0)
Type:        dynamic
Alignment:   1
Size:        124 LEBs (31490048 bytes, 30.0 MiB)
State:       OK
Name:        boot
Character device major/minor: 245:1
-----------------------------------
Volume ID:   1 (on ubi0)
Type:        dynamic
Alignment:   1
Size:        620 LEBs (157450240 bytes, 150.1 MiB)
State:       OK
Name:        root_A
Character device major/minor: 245:2
-----------------------------------
Volume ID:   2 (on ubi0)
Type:        dynamic
Alignment:   1
Size:        620 LEBs (157450240 bytes, 150.1 MiB)
State:       OK
Name:        root_B
Character device major/minor: 245:3
-----------------------------------
Volume ID:   3 (on ubi0)
Type:        dynamic
Alignment:   1
Size:        636 LEBs (161513472 bytes, 154.0 MiB)
State:       OK
Name:        data
Why Do we Need a Bootfs Image?
In our implementation the bootfs is mandatory. It contains the following files:
root@kontron-mx8mm:~# ls /mnt/
fitImage_active    fitImage_inactive  lost+found         sys_active
The U-Boot looks into the file sys_active which is the current active Rootfs partition. After an
update this file gets altered, so that partitions are switched. Also we update the kernel in the last
step and keep the old one (active/inactive) as fallback if something bad happens. Switching back after
failure is done automatically from executed U-Boot scripts.
Why Do we Need a Userfs Image?
The userfs image is not mandatory but can be used to install applications and files which should persist
during a system update. If you install files during the build into /usr/local those files will get extracted
and copied into the userfs image. You can see an example in this recipe.
Perform Seamless System Update using SWUpdate
The advantage of having an A/B setup is that you can perform a system update without having to boot into separate rescue/recovery system. This will make the update more comfortable in the end because the update can be downloaded and executed in the background during normal operation.
A disadvantage is the bigger memory footprint of the device. If you are interested in different concepts and in general how it works, please read the SWUpdate documentation.
Creating an SWUpdate Image
You need a special image type (*.swu archive) which can be read and executed by the swupdate tool.
This file can be created with bitbake:
bitbake swupdate-img(-qt)
This will create an archive containing our default image ìmage-ktn(-qt) and includes further files
like sw-description which swupdate can use and install.
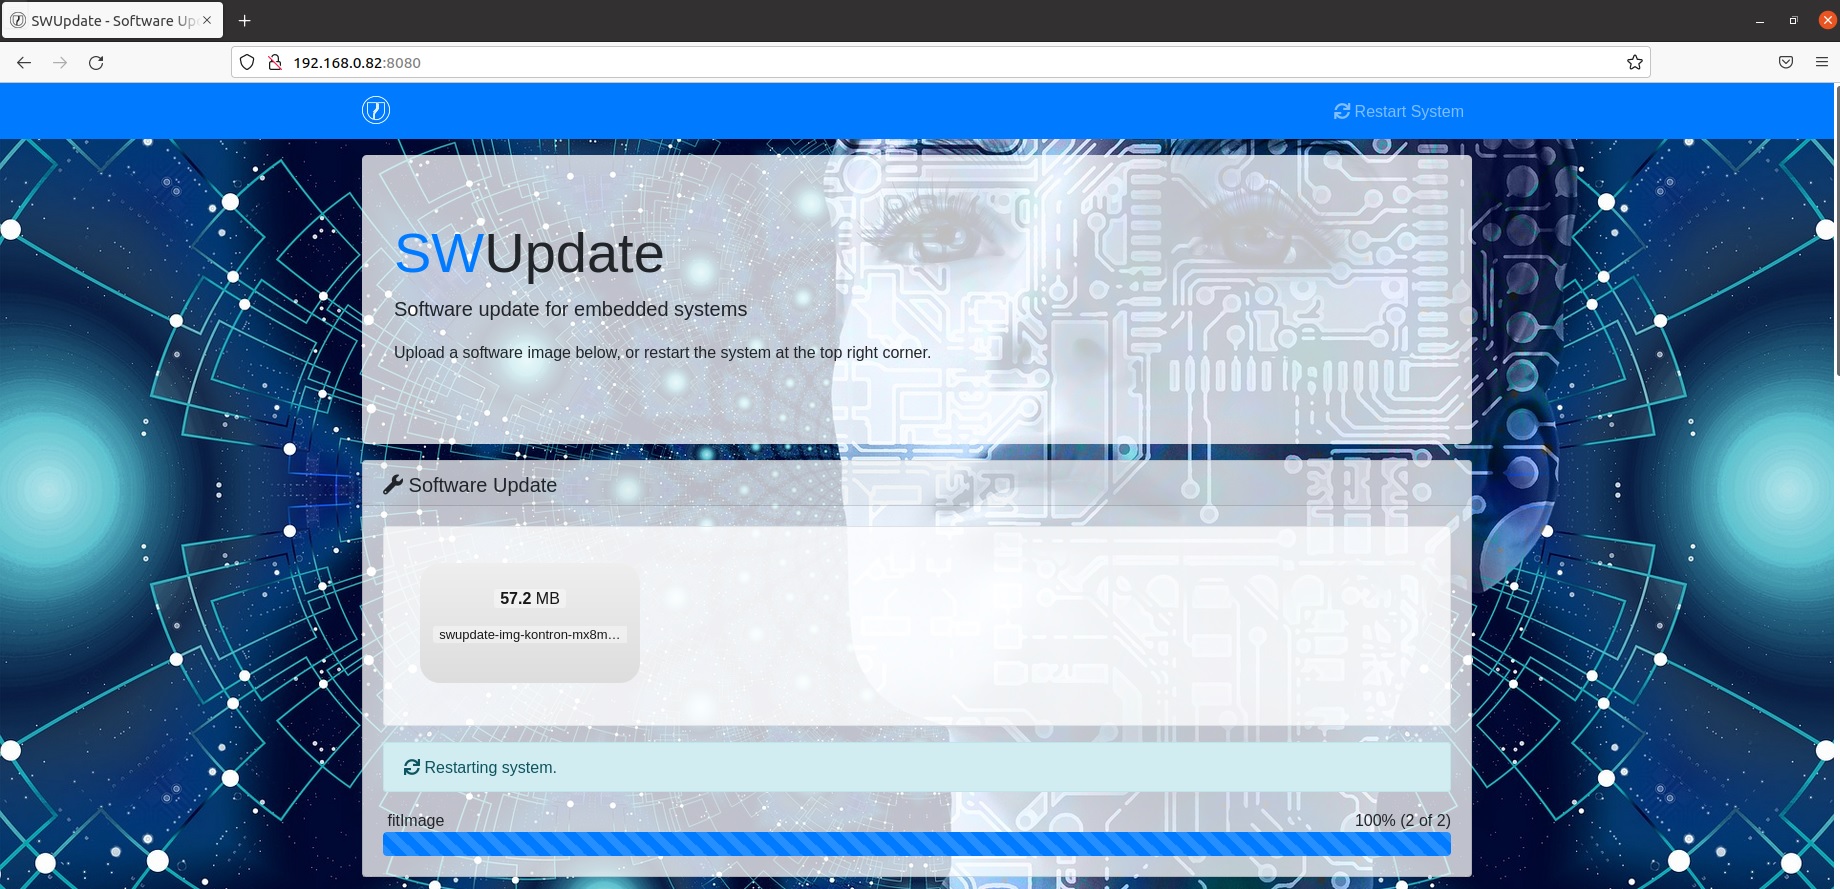
Install Update with Integrated Webserver
The default image starts a webserver provided by swupdate. It will listen for connections on
http://$DEVICE_IP:8080. The device will make a DHCP request and fallback to 192.168.1.11 if no
DHCP server is available.
With the webserver you can download and install a *.swu image onto the device.
Hint
This is just an example of a quite handy feature of swupdate. In the field you probably want to download
the update from an external webserver or from an USB drive. Please look at the file /usr/lib/swupdate/conf.d/09-swupdate-args
how swupdate is invoked. Further parameters are described in the official SWUpdate documentation.
After installing you can reboot the device which will then start into the updated partition.